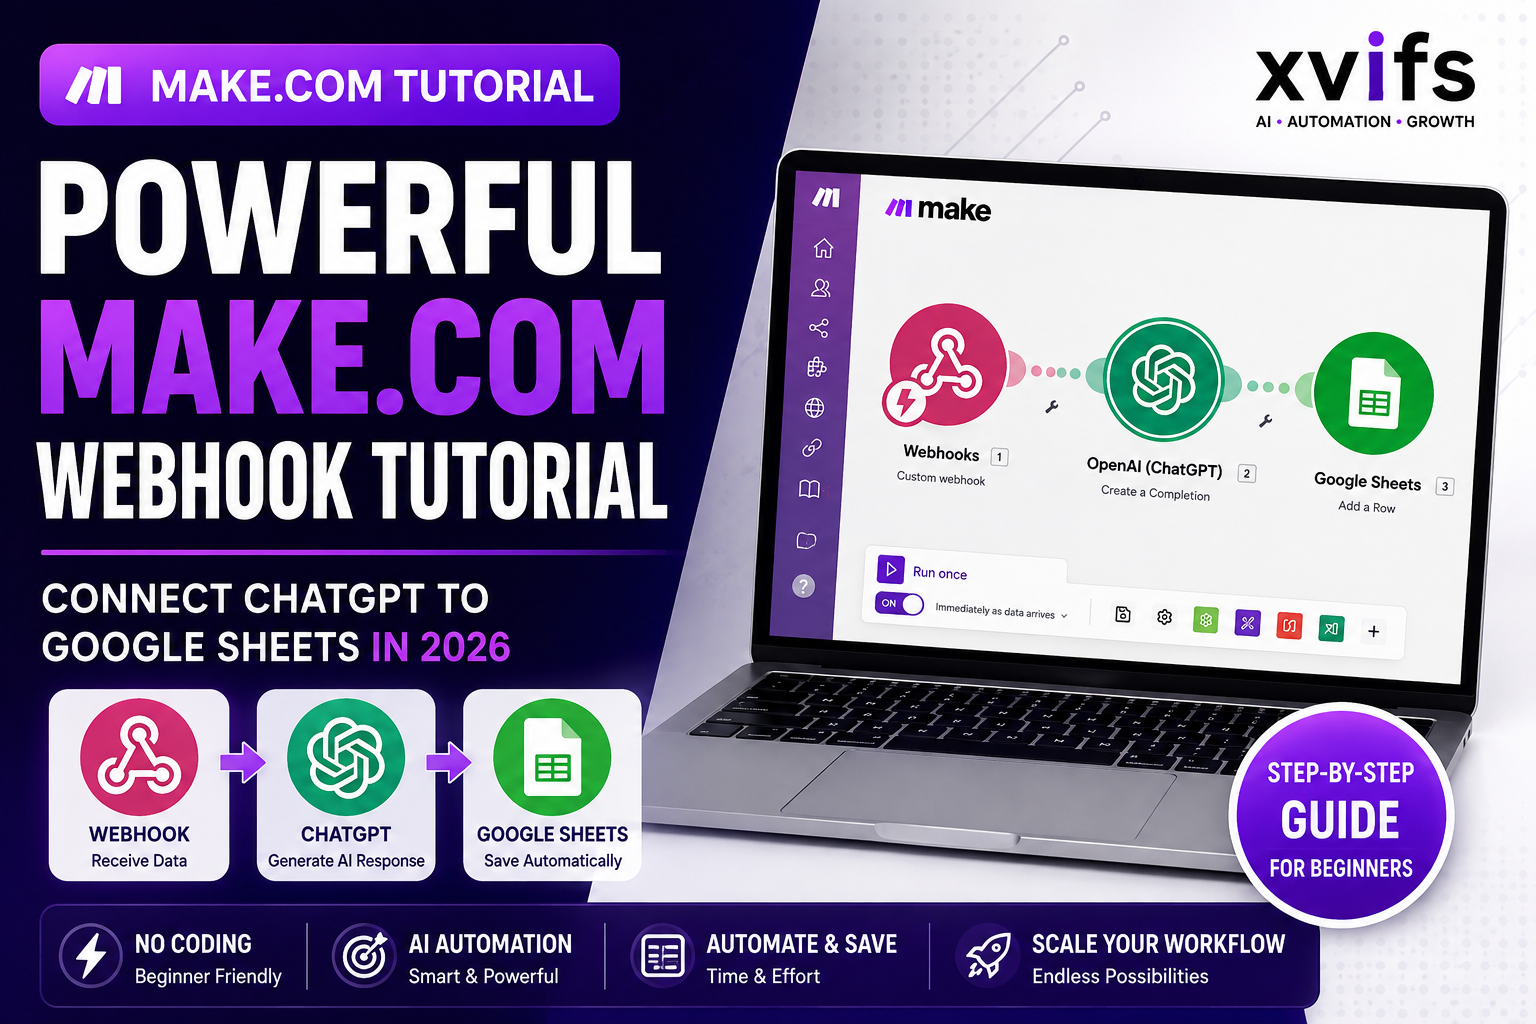
Make.com Webhook Tutorial: 7 Powerful Ways to Automate in 2026
Build Your First AI Automation with Make.com, ChatGPT, and Google Sheets — Step by Step If you’re looking for a practical Make.com webhook tutorial, this guide shows you how a Make.com webhook receives data, triggers a scenario, and passes that data into later modules. We will create a Make.com custom webhook, send incoming data to OpenAI for AI processing, and automatically save the original request and generated response in Google Sheets. Our finished workflow is Make.com Webhook → OpenAI (ChatGPT) → Google Sheets. This beginner-friendly webhook automation tutorial focuses on a real workflow rather than theory. If you are completely new to the platform, first read our complete Make.com tutorial for beginners, then return here for this hands-on webhook project.
What You’ll Learn in This Make.com Webhook Tutorial
- Create and test a Make.com custom webhook
- Capture incoming webhook data
- Build a Make.com OpenAI integration
- Send webhook data to ChatGPT
- Create a Make.com Google Sheets automation
- Test and activate the complete workflow
- Troubleshoot and scale the automation
How a Make.com Webhook Works
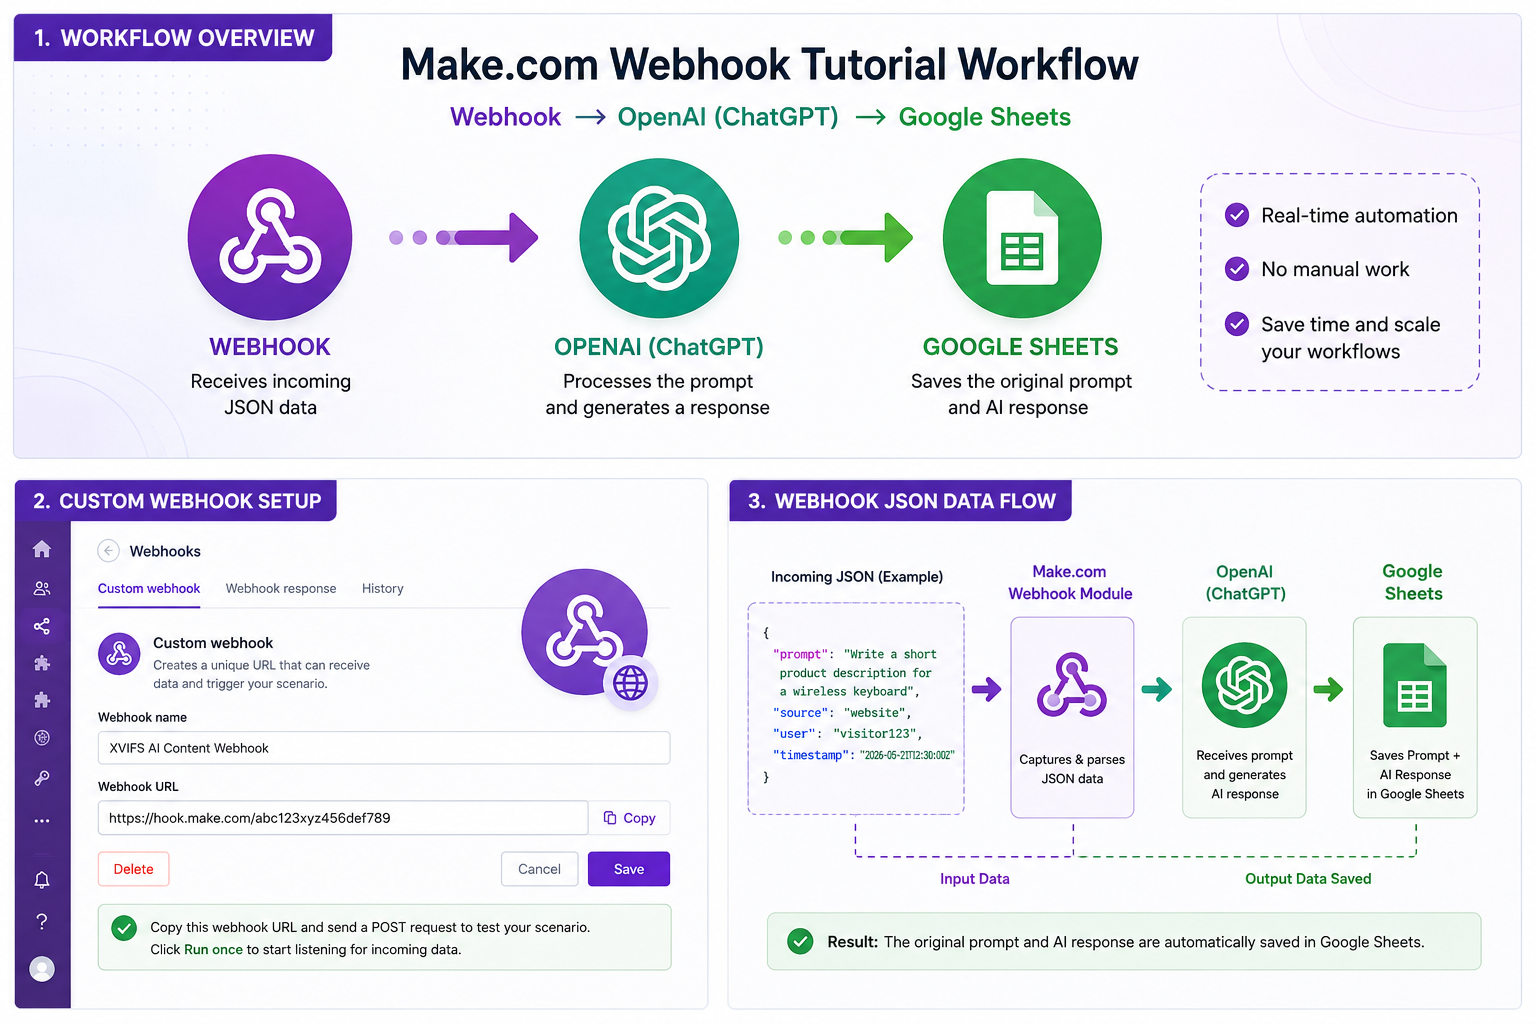
A Make.com webhook works as an instant trigger. Another website, app, form, or API sends data to the webhook URL, Make.com receives that payload, and the scenario can immediately continue with filters, routers, OpenAI, Google Sheets, CRM tools, notifications, or other actions.
The basic flow is: external app → webhook URL → Make.com scenario → processing modules → destination app. This makes webhooks useful when you want near-real-time automation instead of waiting for a scheduled check.
What Is a Make.com Webhook?
A Make.com webhook is an HTTPS endpoint that receives data from another website, application, form, API, or online service and can trigger a Make.com scenario. Instead of repeatedly polling for new information, an external service can send data to the webhook when an event occurs. Make’s official documentation explains how webhooks work as instant triggers and how custom webhooks receive incoming requests. See the Make Webhooks Help Center for the platform’s current guidance.
What Are We Building in This Make.com Webhook Tutorial?
Our workflow is simple but powerful: Webhook → OpenAI → Google Sheets. A request reaches the webhook, OpenAI processes the prompt, and Google Sheets stores both the original prompt and the AI response.
What You Need Before Starting
- A Make.com account
- An OpenAI API account and API credentials
- A Google account
- A Google Sheet
- About 15–30 minutes
Step 1: Create a New Make.com Scenario
Log in to Make.com and create a new scenario. A scenario is the visual workspace where your automation modules are connected. Give it a clear name such as XVIFS AI Content Automation, then open the blank canvas.
Step 2: Add Webhook as the Trigger
Click the large + button, search for Webhooks, select the Webhooks app, and choose Custom webhook. This module becomes the trigger that receives incoming data and starts the automation.
A custom webhook is ideal for real-time workflows such as website forms, API requests, customer inquiries, lead capture, chatbots, and application events.
How to Set Up a Make.com Custom Webhook
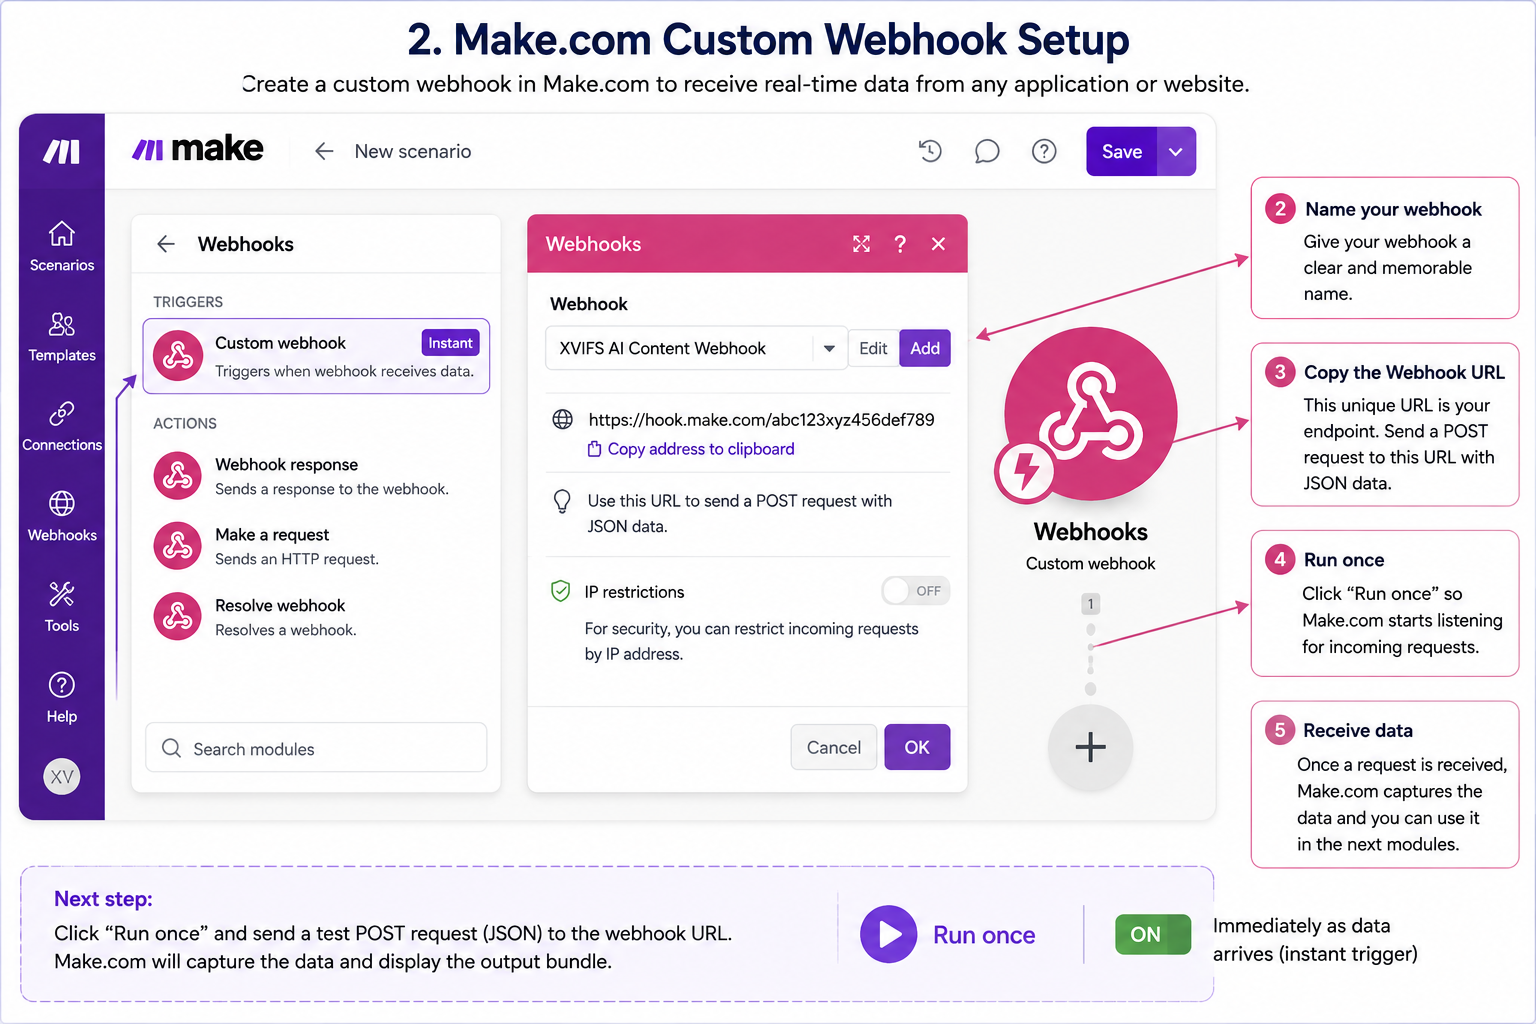
To set up a custom webhook, add the Webhooks app, choose Custom webhook, create a new webhook, save it, and copy the generated HTTPS URL. Keep the scenario in Run once mode during the first test so Make.com can detect the incoming data structure.
After sample data is received, verify the detected fields before mapping them into OpenAI, Google Sheets, or another module. If the payload changes later, test again with representative data so the mapping stays accurate.
Step 3: Create Your Custom Webhook in This Make.com Webhook Tutorial
Inside the Webhooks module, click Add, name the webhook XVIFS AI Content Webhook, save it, and copy the unique webhook URL generated by Make.com.
Important Security Note
Do not publicly share a production webhook URL. For important workflows, use appropriate authentication, validation, filters, and security controls before processing sensitive requests.
Make.com Webhook Request Methods and JSON Payloads
Custom webhooks commonly receive data through HTTP requests such as POST. JSON is one of the most common payload formats because it can carry structured fields such as names, emails, order details, IDs, status values, and prompts.
During testing, keep the sample payload simple and include the same field names your real application will send. Consistent field names make later mapping more reliable.
Step 4: Test Your Make.com Webhook
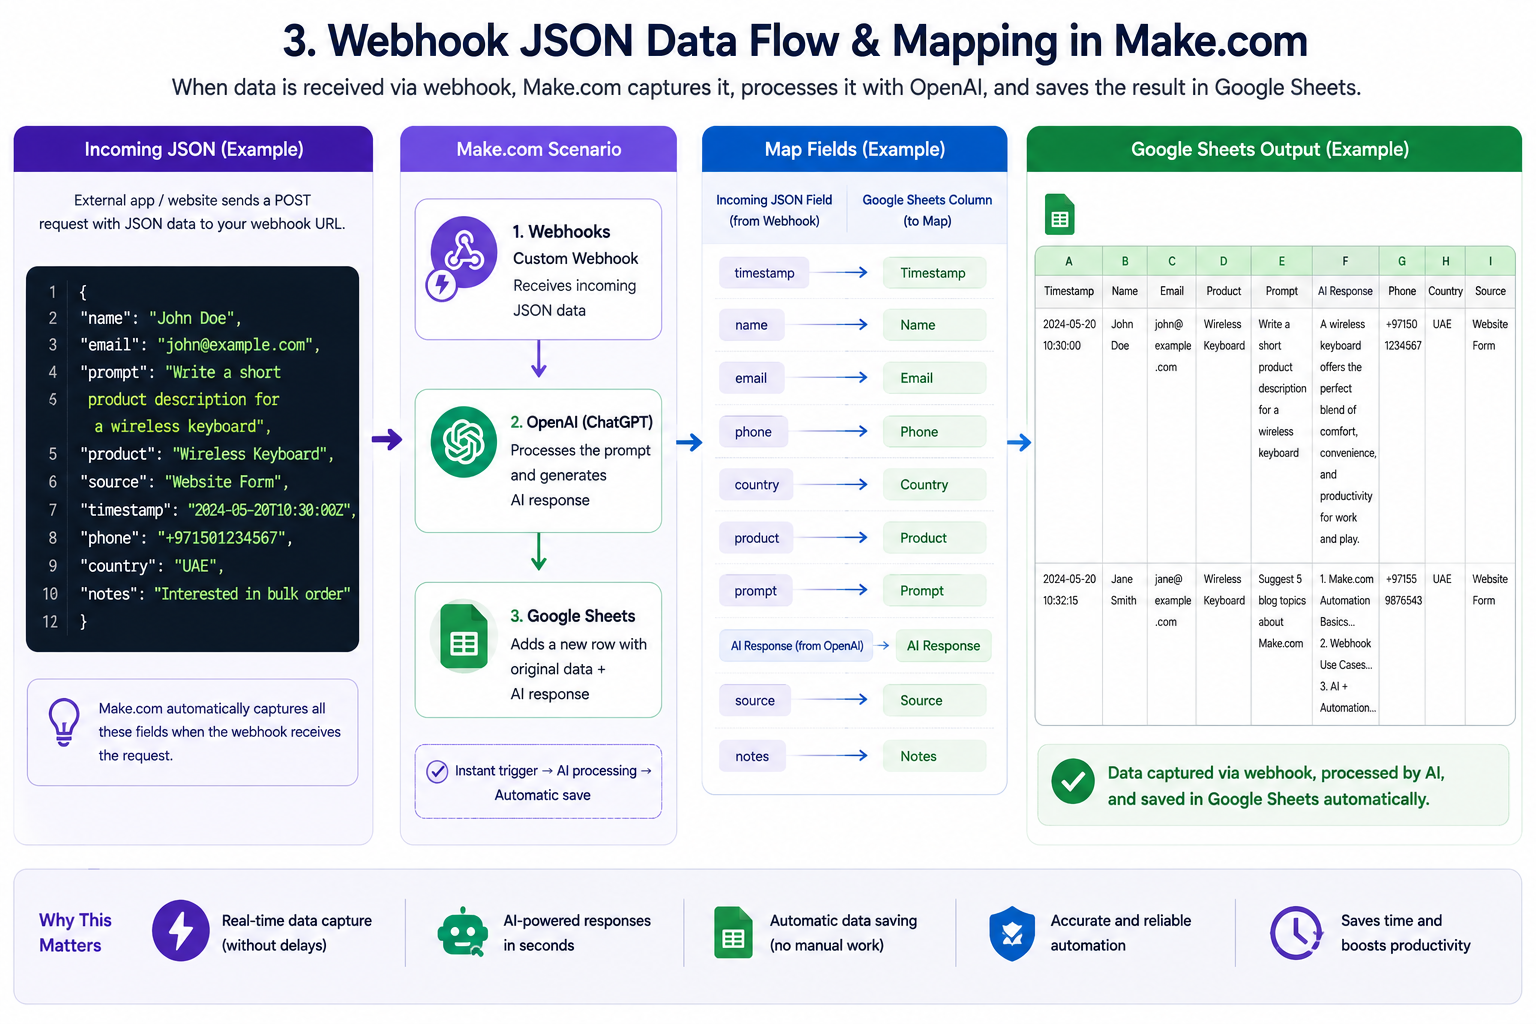
Click Run once so Make.com starts listening for incoming data. Then send a test POST request to the webhook URL.
{
  "prompt": "Write a short product description for a wireless keyboard"
}
Once the request arrives, Make.com captures the prompt field. This sample data is what allows the field to become available for mapping in later modules.
Step 5: Build the Make.com OpenAI Integration
Add an OpenAI module after the webhook and connect your OpenAI API account. Choose the current text-generation or chat action available in your Make.com account and select the appropriate model for your workflow.
A ChatGPT subscription and OpenAI API usage are separate services. Check the OpenAI API platform and current API pricing before running high-volume automations.
Step 6: Send Webhook Data to ChatGPT in This Make.com Webhook Tutorial
Map the webhook’s prompt field into the OpenAI input. Add clear instructions around the incoming prompt so the AI knows exactly how to respond.
You are a professional marketing assistant. Answer the following request clearly and concisely:

{{Webhook.prompt}}
Now every request arriving through your webhook can contain a different prompt, making the Make.com ChatGPT integration dynamic.
Step 7: Create Your Google Sheet
Create a Google Sheet named XVIFS AI Automation Results and add four columns: Timestamp, Original Prompt, AI Response, and Status. Then add Google Sheets to your Make scenario, choose Add a Row, connect your Google account, and select the spreadsheet.
You can review the current connector details on the official Make Google Sheets integration page.
Step 8: Map the Data to Google Sheets
Map the fields so each incoming request is stored correctly. Use the current date/time for Timestamp, the webhook’s prompt for Original Prompt, the OpenAI output for AI Response, and enter Completed for Status.
| Google Sheets Column | Data Source |
|---|---|
| Timestamp | Current date/time |
| Original Prompt | Webhook prompt |
| AI Response | OpenAI response |
| Status | Completed |
Step 9: Test the Entire Make.com Webhook Tutorial Scenario
Click Run once and send another webhook request. Confirm that the webhook receives the data, OpenAI generates a response, and Google Sheets creates a new row.
{
  "prompt": "Write five catchy headlines for a productivity app"
}
If one module fails, open its execution details, correct the connection or field mapping, and run the test again.
Step 10: Activate Your Make.com Scenario
After the end-to-end test succeeds, save the scenario and switch it on. Your webhook-triggered automation can now run automatically whenever new data arrives, subject to your Make.com configuration and plan limits.
Instant Webhooks vs Scheduled Triggers in Make.com
Use a webhook when the source application can send data immediately after an event. Use a scheduled trigger when Make.com needs to check for new data at intervals because the source does not provide a webhook or instant event.
For lead forms, payment events, support requests, chatbots, and API callbacks, webhooks are usually the better fit because they reduce unnecessary polling and can start the scenario as soon as the event occurs.
Step 11: Enhance and Scale Your Automation
Once the basic workflow is stable, you can add filters, routers, error handlers, notifications, CRM integrations, WordPress, Slack, Notion, Airtable, and other modules.
For broader Make.com concepts such as scenarios, modules, bundles, filters, routers, iterators, data mapping, and error handling, see our Make.com Tutorial for Beginners (2026).
Make.com Webhook Tutorial: Webhook vs Scheduled Automation
A scheduled automation checks for information periodically. A webhook is event-driven: another application sends the data when the event happens. Webhooks are particularly useful for form submissions, website leads, API requests, customer inquiries, payment events, chatbots, CRM changes, and AI applications.
5 Practical Make.com Webhook Automation Ideas
1. AI Lead Qualification
Website Form → Webhook → OpenAI → Google Sheets. AI can classify incoming leads by intent or priority.
2. Customer Feedback Analysis
Send feedback through OpenAI to classify sentiment and store structured results in Google Sheets.
3. AI Content Generator
Turn content requests into headlines, product descriptions, social media captions, email drafts, and other marketing assets.
4. Support Ticket Classification
Classify incoming support messages as billing, technical, account, refund, or general inquiries before routing them.
5. SEO Content Idea Automation
Send a keyword through the workflow and ask OpenAI to generate article angles, FAQs, title ideas, meta-description drafts, and supporting terms. For more AI content ideas, browse our AI tools guide and our Surfer SEO content brief guide.
Common Make.com Webhook Problems and How to Fix Them
Webhook Is Not Receiving Data
Verify the webhook URL, request method, JSON format, and that Make.com is listening during the initial test.
Webhook Fields Are Missing
Send representative sample data again so Make.com can detect the fields you need to map.
OpenAI Is Not Receiving the Prompt
Check that the webhook’s prompt field is mapped into the correct OpenAI input field.
Google Sheets Is Not Adding a Row
Recheck Google authorization, spreadsheet selection, worksheet selection, and field mapping.
Run Once Works but the Automation Does Not
Save the scenario and confirm it is activated with the intended instant-trigger or scheduling configuration.
Make.com Webhook Best Practices for Reliable Automations
- Use descriptive scenario and webhook names.
- Validate required incoming data before calling AI modules.
- Use filters to avoid unnecessary API calls.
- Avoid sending unnecessary confidential or personal data.
- Add error handling and logging for production workflows.
- Monitor OpenAI API usage and Make.com operations/credits.
Frequently Asked Questions About Make.com Webhooks
How do I trigger a Make.com scenario with a webhook?
Create a Custom webhook in the Webhooks app, copy the generated URL, place that URL in the source application, and send a test request while the scenario is listening. When data reaches the webhook, Make.com can start the scenario instantly.
Can a Make.com webhook receive JSON?
Yes. A custom webhook can receive structured JSON data, and Make.com can expose the detected fields for mapping into later modules.
Why is my Make.com webhook not receiving data?
Check the webhook URL, request method, payload format, source application, and whether the webhook is currently listening during the initial test. Also confirm that the request is actually reaching the correct scenario.
What is a Make.com webhook?
A Make.com webhook is an HTTPS endpoint that receives information from another application or service and can trigger a Make.com scenario.
How do I create a Make.com custom webhook?
Add the Webhooks application, select Custom webhook, create and name the webhook, save it, and copy the generated URL.
Can I connect Make.com webhooks to ChatGPT?
Yes. Incoming webhook information can be mapped into an OpenAI module, processed by an AI model, and then sent to another application such as Google Sheets.
Can Make.com send ChatGPT responses to Google Sheets?
Yes. Use Google Sheets Add a Row and map the OpenAI output to the relevant spreadsheet column.
Do I need coding knowledge?
Not for this basic workflow. Basic knowledge of JSON, HTTP, and APIs becomes helpful as your automations become more advanced.
Is OpenAI API access included with ChatGPT?
Do not assume so. ChatGPT subscriptions and OpenAI API billing are separate services, so check current API pricing before running high-volume workflows.
Final Thoughts: Build Your First Make.com Webhook Automation
In this Make.com Webhook Tutorial, you built a practical Make.com Webhook → OpenAI → Google Sheets workflow. The Make.com custom webhook receives external information, the Make.com OpenAI integration processes it, and the Make.com Google Sheets automation stores the result automatically. Next, continue with our Make.com beginner guide. If you also use other automation platforms, compare the broader automation approach in our Zapier Workflow Automation Guide.